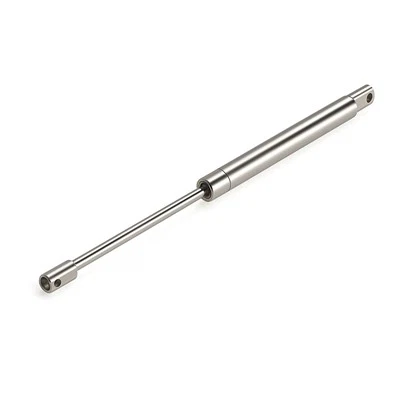
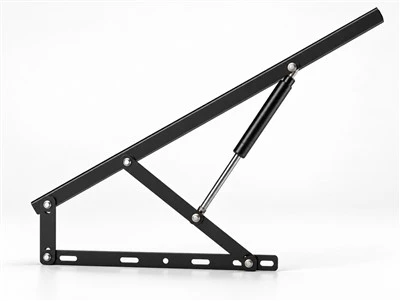
Hey everyone, if you're here, chances are you're either working with safety locking gas springs - or trying to figure out if yours are actually doing the job they're supposed to. As a supplier who's spent years troubleshooting these things for folks in medical, marine, industrial automation, and outdoor equipment, I can't tell you how many times I've gotten a call like: "My spring says it's locked, but when I nudge it, it moves. What's the deal?"
Locking force is make-or-break for these parts. Too weak, and your seat in an operating room might slip when a patient's weight shifts - or a heavy hatch on a boat could drop unexpectedly when waves hit. Too strong, and a technician might struggle to adjust a machine guard mid-repair, leading to frustration or even injury. So knowing how to measure that force accurately isn't just a nice-to-have; it's non-negotiable for anyone who designs, installs, or tests these springs.
Let's break this down like we would on a shop floor - no stuffy engineering jargon unless it's necessary. First, let's get clear on what "locking force" actually means for a safety locking gas spring. Unlike a standard gas spring that just absorbs or pushes weight, a safety locking one has a built-in mechanism (usually a positive lock or a friction-based system) that holds its position at any point along the rod. The locking force is the minimum amount of external force needed to move the rod when the lock is engaged - not the push or pull force the spring generates when it's unlatched. That's a key distinction I see a lot of people mix up.
The Tools You'll Actually Need (No Fancy Lab Gear Required)
You don't need a million dollar test rig to get reliable measurements, though accuracy does matter. Here's what I grab on a daily basis in our warehouse:
- A digital force gauge (1000N capacity is more than enough for most standard springs, but go higher for heavy-duty models). Make sure it's calibrated within the last 12 months - a cheap uncalibrated gauge will give you garbage data, and that's the last thing you want when safety's on the line.
- A custom test fixture (or a way to mount the spring securely). If the spring twists during testing, your readings will be all over the place. I've rigged this with a vise and some 3D-printed brackets for smaller springs, but for larger ones, we use a simple load frame that locks the cylinder and rod in place.
- A level (to make sure the spring isn't tilted). Tilt changes the force vector, so you're not measuring pure linear force - which is what the locking mechanism actually works against.
- A notebook (or a notes app) to log repeat readings. One test is a fluke; three to five consistent readings is data.
If you're dealing with harsh environments - like marine or offshore applications - you might also want to test a stainless steel variant, since standard steel can corrode. We've got Stainless Steel 316 Safety Locking Gas Springs that are built for saltwater and extreme temps, and their locking force specs require extra care during measurement because the corrosion-resistant coating adds a tiny bit of friction you have to account for.
Step-by-Step: How to Measure Locking Force (Without Messing Up)
Let's walk through this step by step, like I'd show a new hire. Skip any of these, and your numbers will be wrong.
-
Prep the spring correctly first. If it's a new spring straight out of the box, cycle it 5 to 10 times fully - extend and retract it - before testing. Safety locking mechanisms can "break in" a little, and a stiff new lock will give a higher initial force reading that's not representative of its real-world performance. If it's a used spring, clean the rod and cylinder first - dirt or grime is a huge culprit for inconsistent force. For springs with a positive lock (the kind that clicks into place at preset positions), make sure you're locking it into a middle or end position, not a click point, since those can have slightly different force requirements. We also offer Safety Locking Gas Springs With Positive Lock for applications where you need fixed stop points, so just note that testing a click stop is a little different than a floating lock.
-
Mount the spring straight and secure. This is the part I see mess up the most. If the spring is mounted at an angle, the force you measure will be higher than the actual locking force because you're fighting both the linear movement and the tilt. Here's a quick rule: the axis of the force gauge should be perfectly aligned with the axis of the spring rod. No more than 1 degree of tilt, max. Also, clamp the cylinder end so it can't rotate, and attach the force gauge to the rod's end - don't pull on the rod itself by hand, that's way too inconsistent.
-
Zero the force gauge. Most digital gauges have a zero button, but make sure you do this while the gauge is already attached to the rod and the spring is locked in place. If you zero it before mounting, you'll get a false reading when the gauge's weight pulls on the rod.
-
Apply force slowly and steadily. This isn't a tug-of-war. You want to apply force at a rate of about 10mm per second - slow enough that you're not shocking the lock, fast enough that you don't let friction build up (wait, no, friction is part of the locking force, so don't go too fast). Aim for a smooth pull, and watch the gauge. The moment the rod starts to move, that's your locking force. Jerking it will make the gauge spike, and you'll get a number that's higher than the actual minimum force needed. That spike is not your number - it's the force to overcome static friction, not the dynamic locking force that matters for real use.
-
Repeat and average. I can't stress this enough. Do this test at least three times, and if you're testing different positions (top, middle, bottom of the rod), test each position five times. For example, I once had a customer whose spring looked like it had a 200N locking force on paper, but when we tested it at 10 different positions, it varied from 180N to 220N. That's a problem - because if it's at 180N at the position that's under most weight, that's where slip could happen. Averaging removes those outliers.


Common Mistakes That Skew Results (I've Seen All of These)
Let's talk about the errors that waste people's time, because avoiding them will save you so much headache.
- Mixing up locking force with extension force: Extension force is the force the spring exerts to push the rod out when unlocked. Locking force is the force to move the rod when it's locked. They're not the same, and if you use an extension force gauge reading as your locking force, you're going to be way off.
- Not accounting for side loads: If your spring is attached to a moving part (like a chair seat that swivels), there's going to be some side load. You can't eliminate that, but you can measure it and adjust - or use a spring rated for higher side loads if that's a permanent condition. For our stainless steel marine springs, we test side loads separately because saltwater environments often mean more movement, so their locking force has to hold up even when there's minor side stress.
- Ignoring temperature and environment: Locking force can change with temp. A spring used in a -40°F freezer will have different locking force than one used in a 120°F factory, because the lubricant in the mechanism thickens or thins. If you're testing for extreme temps, do it in a temperature-controlled chamber if you can, or at least let the spring acclimate to the test temp for 24 hours before testing.
- Using the wrong mounting hardware: A loose mounting bracket will flex when you apply force, making your readings lower than they should be. We always tell customers to use the matching mounting eyes or clevises that come with the spring - don't DIY it with a random bolt and washer, that's asking for inconsistent data.
What Do the Results Mean for Your Application?
Once you have your average locking force, you need to match it to what your part actually needs. For example:
- Medical chairs: Typically need a locking force between 150N and 250N. Too low, and a patient shifting will move the seat; too high, and a caregiver can't adjust it easily.
- Marine hatches: Higher, usually 300N to 500N, because waves can add sudden, high forces to the hatch. That's why our stainless steel marine springs have a 10% higher locking force rating to account for saltwater corrosion and sudden side loads.
- Industrial machine guards: Heavy-duty, so 500N to 800N, because the guard might be holding back a heavy part that moves unexpectedly.
If you're working with a positive lock system - the ones that click into preset positions - the locking force will be slightly higher at the click points, so test there too. A lot of our customers order Safety Locking Gas Springs With Positive Lock for conveyor guards or workstations where they need the spring to hold firmly at specific stop points, not just any position.
When to Trust the Factory Specs vs. Testing Your Own
Factory specs are a baseline, but they're usually tested under ideal conditions - straight line, room temp, no side loads. If your application has any variables (extreme temps, side loads, heavy side movement), you should definitely test your own. For example, I had a customer last year who installed a standard safety spring in a food processing plant where washdown water got everywhere. The factory spec was 200N locking force, but after 6 months of washdowns, corrosion had reduced the locking force to 120N - which was too weak. They switched to our stainless steel 316 springs, which have a higher initial locking force and resist corrosion, and that fixed the problem.
Another example: a hospital client had a batch of chairs where the locking force was 180N, just under the 200N they needed. They'd assumed the factory specs were accurate for their actual use, but when we tested them with a caregiver applying a typical 150N of force to adjust the seat, it moved. That's why testing on-site with your actual application's conditions is way more reliable than just looking at a spec sheet.
Wrapping Up (And How to Get the Right Spring for Your Job)
Measuring locking force doesn't have to be complicated. Stick to the steps, use calibrated tools, test multiple times, and don't skip the prep. The goal isn't just to get a number - it's to make sure your safety locking gas spring does exactly what it's supposed to, when you need it.
If you're not sure which spring is right for your application, or you need help testing your current ones, we're here to help. We've worked with hundreds of teams to get the right locking force for everything from medical equipment to offshore rigs, and we can walk you through testing or recommend the perfect spring.
References
- ISO 12215-5:2019, Small craft - Hull construction and scantlings - Part 5: Materials, hull design and construction
- ASME B110.1M-2018, Safety Standard for Gas Springs
- DIN EN ISO 6892-1:2019, Metallic materials - Tensile testing - Part 1: Method of test at room temperature
- Safety and Health Administration (OSHA), Machine Guarding Guidelines, 2022